Does your website have /wordpress or /wp in the URL? Often this is a result of installing WordPress in a sub-directory or on a subdomain and in most cases is accidental. While changing the WordPress directory is quite easy, it does require making a few small changes to your .htaccess file.
Can’t I Just Reinstall WordPress?
In theory, you could reinstall WordPress in the root directory of your hosting plan instead of removing /wp from the Site URL, however, more often than not it is more work to reinstall it, especially if you have a database that already contains content. If your website has a fresh install of WordPress however, you won’t lose a lot of data or time reinstalling it.
Changing Your WordPress Site Address
Before your change your WordPress Site URL, it is recommended that you create a backup of your website.
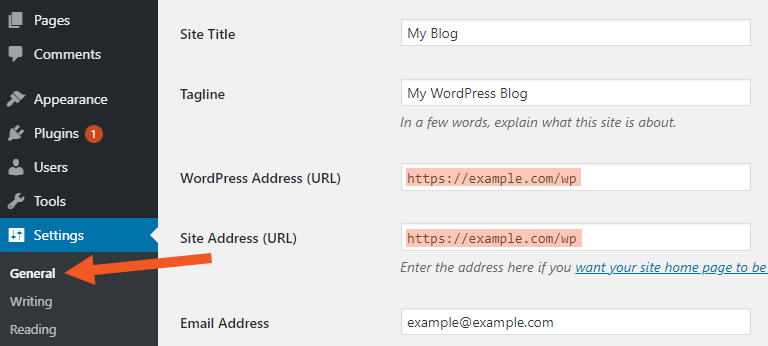
The first thing you will need to do is log in to your WordPress Admin area. Once you have logged in, click on Settings ➝ General.
You will see the two fields highlighted in the below example, the WordPress Adress and the Site Address.
You will need to change the Site Address (URL) field to your root domain name (i.e. https://www.example.com or https://example.com).
Make sure you leave the WordPress Address as is.
Once you have updated the Site URL, go ahead and click the “Save Changes” button at the bottom to save the settings.
The second step in updating your WordPress Site URL is copying the .htaccess and index files to your root folder.
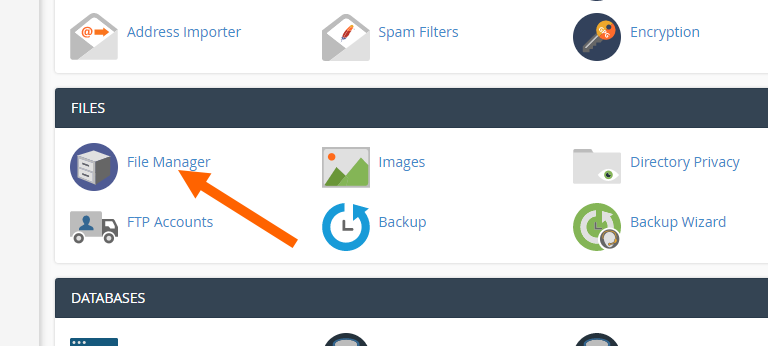
If you have a BlackSun shared hosting plan, you can access your files via the File Manager in your cPanel, otherwise — you will need to follow along with your FTP client.
Login to your cPanel, and click on the File Manager. Open the WordPress folder (i.e. /public_html/wp/).
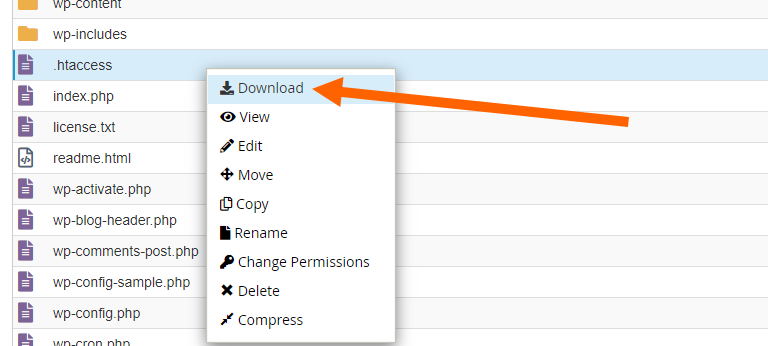
From the file manager, or your FTP client, download the index.php and .htaccess files by right-clicking them and clicking on Download.
Open the index.php file with your text editor (i.e. notepad), and look for this line.
require( dirname( __FILE__ ) . '/wp-blog-header.php' );
Replace the above line with this:
require( dirname( __FILE__ ) . '/wp/wp-blog-header.php' );
Once you have replaced the line, save the index file. Go back to your file manager and go to your website’s root folder (i.e. public_html or www). Upload the .htaccess file you downloaded as well as the edited index.php file to this directory.
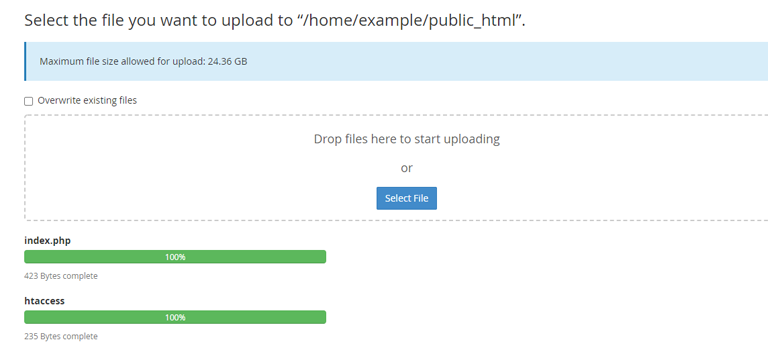
Once you’ve uploaded both files, browse to your website and make sure that everything is working correctly.
